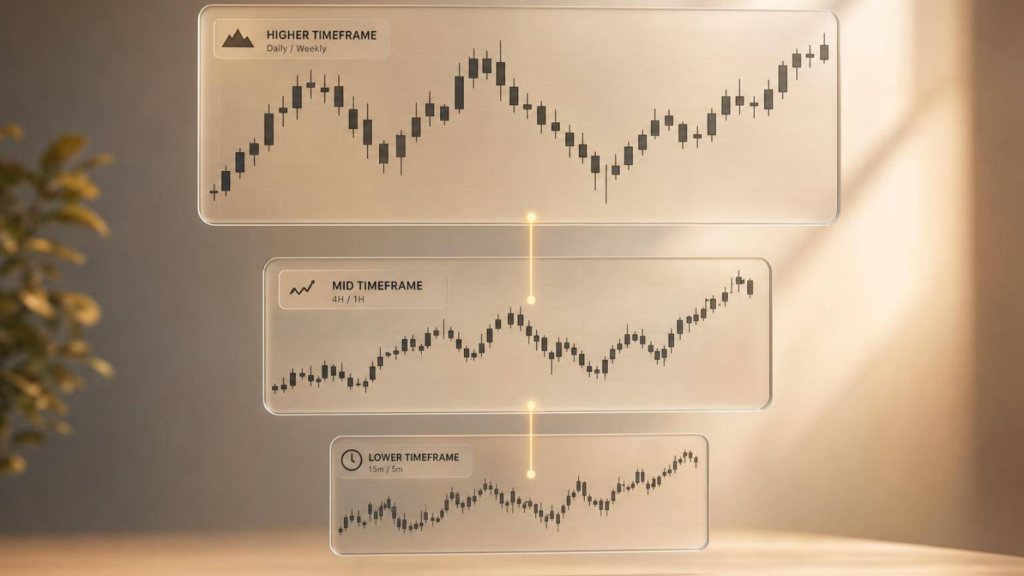
If you use only one chart, you can miss the bigger picture. Using multi-timeframe analysis to do 3 things in order: find the trend on a higher chart, spot the setup on a middle chart, and time the entry on a lower chart.
Here’s the short version:
- Use 3 charts only: higher, middle, lower
- Read them top-down: trend first, then setup, then entry
- Space them about 4x to 6x apart so each chart shows something different
- Let the higher timeframe lead when charts conflict
- Journal each trade with your entry time, bias, stop, and S$ risk
A few numbers stand out:
- Trades aligned on at least 2 timeframes may win about 67% of the time, versus 49% for one-timeframe trades
- When all 3 timeframes line up, win rate may improve by 5% to 12%
- Trading against the higher-timeframe trend has often come in below 40%
If you trade SGX, this matters even more. Overnight US and regional moves can affect the 9.00 am SGT open, so I’d anchor bias on the Daily chart before looking for intraday entries.
A simple way to think about it:
| Chart | What I look for |
|---|---|
| Higher timeframe | Trend and main support/resistance |
| Middle timeframe | Pullback, breakout, or pause |
| Lower timeframe | Entry trigger and stop placement |
For most part-time traders in Singapore, Weekly / Daily / 4-hour is a clean setup. It gives you structure without forcing you to watch the screen all day.
That’s the whole idea: one process, same order, every trade.
Master Systematic Trading with Collin Seow
Learn proven trading strategies, improve your market timing, and achieve financial success with our expert-led courses and resources.
sbb-itb-466c9b0
How to Choose the Right Timeframes
Stick to three charts. Not more.
Once you pile on extra timeframes, you usually get more noise, not better analysis. The sweet spot is simple: one higher timeframe, one middle timeframe, and one lower timeframe. A fourth chart tends to make things messier without giving you much back.
After you lock in those three charts, choose the set that fits how long you plan to hold the trade.
Timeframe Sets for Position, Swing, and Intraday Trading
Each trading style lines up with a different three-timeframe set.
| Trading Style | Context (Trend) | Signal (Setup) | Execution (Entry) | Holding Period |
|---|---|---|---|---|
| Position | Monthly / Weekly | Weekly / Daily | Daily / 4-hour | Weeks to months |
| Swing | Weekly | Daily | 4-hour | Days to weeks |
| Intraday / Day Trading | 4-hour / 1-hour | 1-hour / 15-minute | 15-minute / 5-minute | Minutes to hours |
| Scalping | 1-hour | 15-minute | 5-minute / 1-minute | Seconds to minutes |
For most Singapore traders who work full-time, Weekly / Daily / 4-hour is the most practical set. You can review it at 4-hour closes, about two to three times a day.
Once your chart trio is set, read the higher timeframe first. Then zoom in step by step.
How to Space Timeframes Without Overcomplicating Your Charts
A good rule is to space each timeframe about 4 to 6 times apart. For example, 1-hour and 4-hour work well together. By contrast, 15-minute and 30-minute often just repeat the same picture and add clutter without giving you anything new.
Going too far apart has its own problem. If the gap is more than 8x, the lower timeframe starts to lose its link to the higher-timeframe context. At that point, the charts stop working as a clear chain.
For SGX traders, the Daily chart is a handy higher-timeframe anchor because overnight global moves can lead to gaps at the 9:00 am SGT open. After you enter, manage the trade on the middle timeframe. If you stare at the execution timeframe too much, it can pull your attention into noise and lead to exits that come too early.
These three charts form the framework for top-down analysis.
A Step-by-Step Top-Down Analysis Process
With your three timeframes picked, use them in the same order on every trade: higher, middle, then lower.
Step 1: Read Trend and Key Levels on the Higher Timeframe
Start with your Weekly or Daily chart. Your job here is simple: figure out the main trend. Look at market structure as a systematic trader. Are you seeing higher highs and higher lows? Or lower highs and lower lows? A basic tool like the SMA200 can help back up what price is already showing you.
Once you have a bias, mark the chart before you drop down. Plot major swing highs, swing lows, and clear support and resistance zones. These higher-timeframe levels carry more weight because more market participants are watching them. Then write your bias in one word: bullish, bearish, or neutral.
When the bias and key levels are clear, move to the middle timeframe to check whether the setup still makes sense.
Step 2: Confirm the Setup on the Middle Timeframe
Go to your Daily or 4-Hour chart, based on how you trade. This timeframe helps you confirm the bias from the higher chart.
A common setup is a pullback into a key zone. If the higher timeframe is bullish, look for price to pull back towards support or a Fibonacci retracement area, often in the 38.2% to 61.8% range, before moving up again. The middle timeframe can also show consolidation. That often means the market is pausing before the next leg.
If price starts breaking down hard through several levels, the setup is losing strength. When that happens, wait for alignment or just stay out.
If the setup still holds, drop to the lower timeframe to plan the trigger and risk.
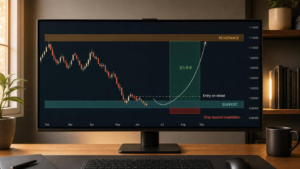
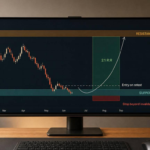
Step 3: Plan Entry, Stop, and Trade Management on the Lower Timeframe
The lower timeframe, usually the 1-Hour or 15-minute chart, is where you tighten things up. The higher timeframe gives you direction. The middle timeframe gives you the zone. The lower timeframe gives you the trigger.
Wait for a clear signal inside your entry zone, such as:
- a pin bar
- a bullish engulfing candle
- a small breakout
Place your stop below the lower-timeframe swing that invalidates the setup.
If the lower timeframe starts moving against the higher-timeframe bias, don’t force it. Sit on your hands if you have to. Wait for alignment, or stand aside fully.
Tools, Rules, and Common Trade-Offs
Once your timeframes are set, give each tool one job on each chart.
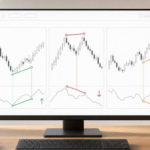
How to Use Support and Resistance, Trend Structure, and Candlesticks
Each tool should do a different part of the work:
| Tool | Higher Timeframe | Middle Timeframe | Lower Timeframe |
|---|---|---|---|
| S/R Levels | Identify major zones and major barriers | Locate specific reaction zones | Find fine-grained levels for tight stop placement |
| Trend Structure | Define the macro bias (HH/HL or LH/LL) | Identify pullbacks and corrections | Confirm structural shifts or reclaims |
| Candlesticks | Signal long-term reversals | Show setup development | Provide the final entry trigger |
Start with the higher timeframe. Mark the major levels there first. Then drop down and use lower-timeframe candlestick patterns ONLY for entries when price reaches those zones.
Keep the same split for every trade:
- Top chart: trend
- Middle chart: setup
- Bottom chart: trigger
That kind of consistency matters. If you keep changing the role of each chart, the whole process gets messy fast.
When the higher and lower timeframes disagree, trust the higher timeframe. Treat it as the main direction, then wait for the lower timeframe to line up again before you enter.
How to Apply Moving Averages, RSI, and ADX Across Timeframes
Indicators should help you filter context, not tell you the same thing three times.
On the higher timeframe, longer-period moving averages like the 50- and 200-period MAs are useful for defining the main trend. On the middle timeframe, tools like RSI are better for spotting pullbacks or overbought and oversold conditions inside that bigger move. On the lower timeframe, price action and candlestick triggers are often enough on their own.
Keep your moving average settings the same across all charts, such as 20, 50, and 200. If you switch settings from one chart to another, signals become harder to read and you increase the risk of overfitting.
Stick to three timeframes only. Add more than that, and you usually get more noise, more conflict, and less clarity.
Price Action Only vs Indicator-Assisted Multi-Timeframe Analysis
Price action and indicators can work well together, but only if they do different jobs across timeframes.
| Feature | Price Action Only | Indicator-Assisted |
|---|---|---|
| Strengths | Focuses on raw market psychology; no lag; identifies key structural breaks early | Provides objective filters; easier to automate; helps identify momentum shifts such as RSI extremes or divergence |
| Limitations | Subjective; requires significant screen time to master; prone to seeing what you want to see | Indicators lag price; can create indicator overload and conflicting signals across timeframes |
| Best Use Case | Identifying major S/R zones and reversal triggers at key levels | Filtering trend direction with moving averages and timing entries with oscillators |
| Risk of False Signals | High during low-liquidity sessions or noise on very low timeframes | High in sideways or ranging markets where indicators produce frequent whipsaws |
A simple rule works well here: use price action for lower-timeframe entries, and use indicators for higher-timeframe direction.
Do not trade against the higher timeframe. That’s where many traders get chopped up. Trading against the higher-degree trend has historically produced win rates below 40%. When all three timeframes line up, a strategy’s baseline win rate can improve by 5 to 12 percentage points.
Building a Repeatable Trading Plan
How to Turn Multi-Timeframe Analysis Into a Written Checklist
The last step is simple: turn the framework into a fixed routine.
Knowing how the method works isn’t enough. You need to write it down so you can follow the same steps every time. A good checklist should cover your timeframe stack, trend rule, setup rule, entry trigger, stop-loss, and position size based on a fixed S$ risk per trade and your stop-loss distance.
Use the same higher, middle, and lower timeframe stack for every trade. That consistency matters. If you keep changing the stack, it becomes much harder to judge what is and isn’t working.
Manage the trade on the signal timeframe. Then back it up with a trade journal. Record every trade with the date and time in SGT, and note the alignment state of all three timeframes at entry. This is where patterns start to show. The journal helps you spot where your process slips or breaks.
For SGX traders, add one more note: did the setup form during core SGX hours (9.00 am–5.00 pm SGT), or was it shaped by overnight global market moves? That matters because gaps can jump past stop-loss levels.
Learning Systematic Execution with Collin Seow Trading Academy

To put that process into a more formal structure, Collin Seow Trading Academy offers learning resources such as the free Market Timing 101 e-course, The Systematic Trader v.2, and live webinars on systematic trading and risk management.
Conclusion: Core Principles to Keep in Mind
Choose three timeframes, follow them in order, and record every trade. Only take trades when the signal timeframe lines up with the higher-timeframe bias. When they conflict, the higher timeframe wins.
If you stick to the checklist each time, the method becomes repeatable. The edge comes from following the same process on every trade.
FAQs
How do I know if my timeframes are too close together?
Your timeframes are too close when they show near-redundant information. In plain terms, you’re looking at almost the same chart, with only small changes in bar counts.
A common rule of thumb is the 4 to 6 times rule. Each timeframe should be about four to six times larger or smaller than the next one. For example, 1-hour and 2-hour charts are often too close. They tend to produce overlapping signals, which can muddy the picture and lead to confusion.
What should I do if the lower timeframe conflicts with the higher timeframe?
If the lower timeframe clashes with the higher timeframe, the higher timeframe comes first. It acts as your main directional filter, so don’t force a trade against the dominant trend.
When the signals don’t line up, the best move is to stay out of the market. Wait until the lower timeframe stops pushing the other way before looking for a trade in the direction of the overall trend.
Can beginners use multi-timeframe analysis without too much complexity?
Yes. If you’re new to multi-timeframe analysis, keep it simple with a three-timeframe setup.
Use the highest timeframe to spot the trend direction, the middle timeframe to read market structure, and the lowest timeframe to time entries and exits.
A steady 4-to-6-times gap between each timeframe helps cut noise and makes the process easier to follow. It also stops you from bouncing between too many charts and second-guessing every move.